
Refashion Clothes From Big Sister’s Closet
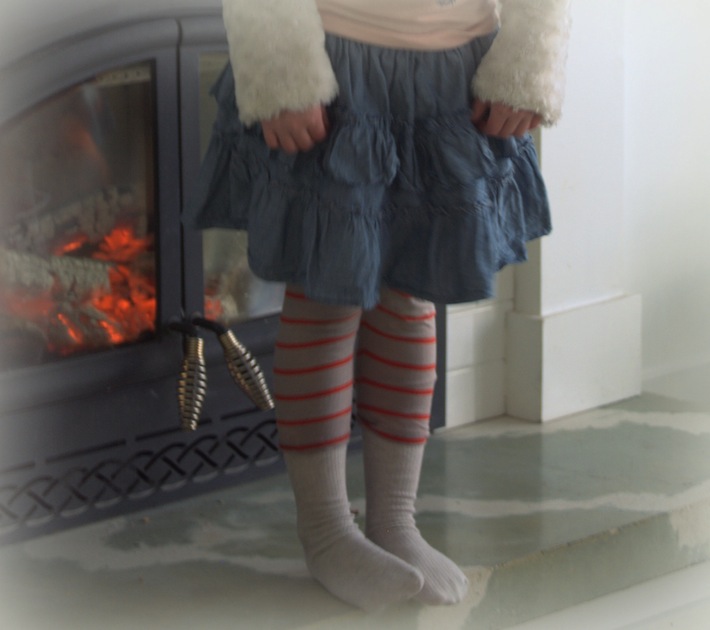
Nora spilled through the front door in a frosty gust yesterday. Snow had found its way into her boots and was clinging to her leggings; her mittened hands were cold-nipped and her cheeks apple-red. We warmed her up by the fire. She calmed down and mellowed out…and was so darn cute (albeit a little soggy) that I had to capture the moment while her cheeks still glowed.
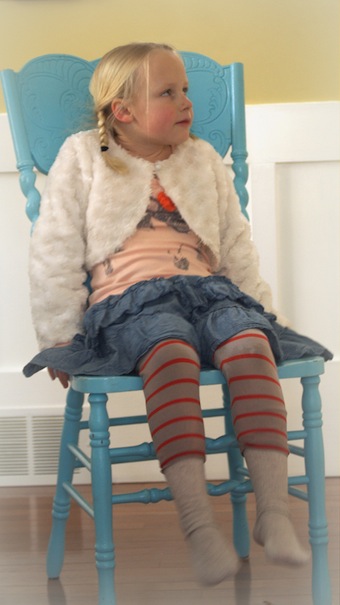
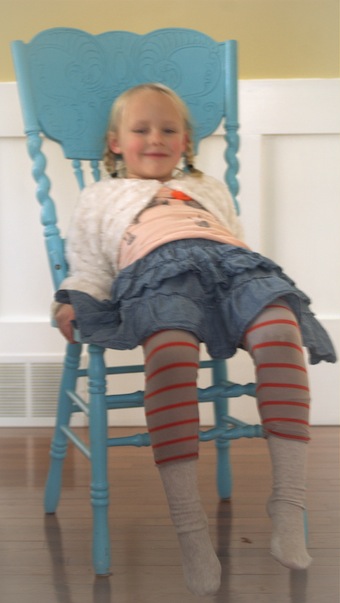
A Little Girl’s Skirt From Her Sister’s Dress
Back in September, I Began With This:
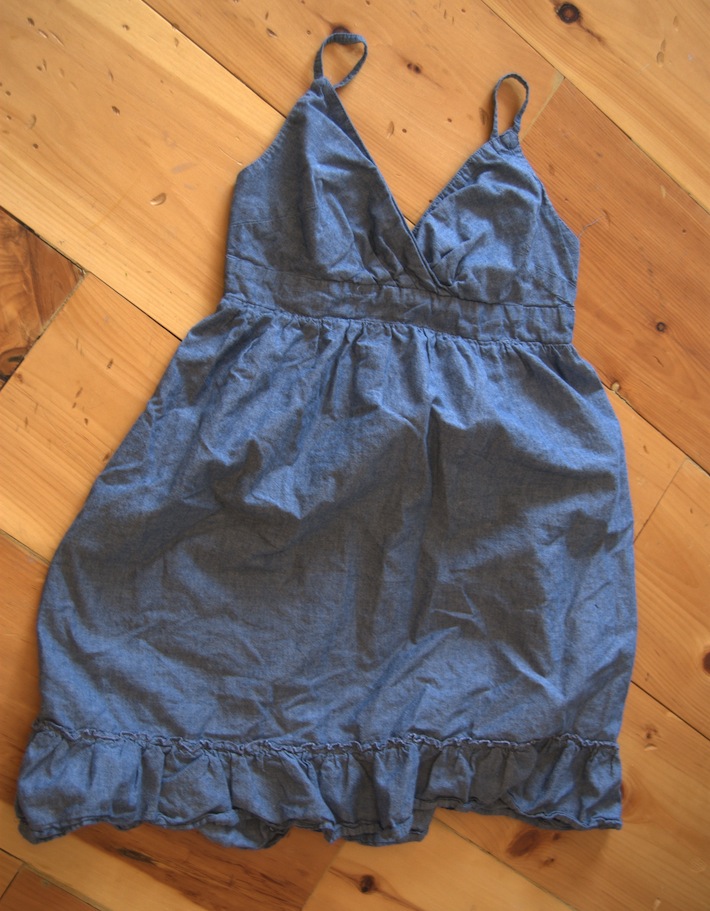
An unloved hand-me-down sundress. Cute (for $10) on the rack, but my girls didn’t like the fit. Michaelyn wouldn’t touch it. Maurya wore it maybe twice. Meisha (after much cajoling) possibly once. I like the fabric. And I was taken by the ruffle at the bottom; I was sad to let it go. It occurred to me that I could refashion a skirt with it. So I did. A rufflier one, for Nora. This is how I did it.
Removed Meager Bodice.

Shortened Skirt/Bartered For New Ruffle.
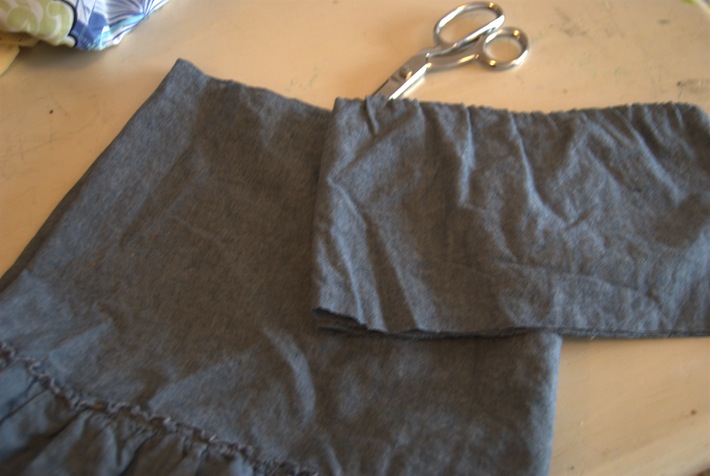
I realized that there was enough fabric in the remaining skirt to take some off for a second ruffle, and still have ample length left for Nora’s skirt. So I cut a thick strip (twice the depth of the skirt’s existing ruffle) straight across the top of the skirt. (Photo shows skirt/strip folded in half for ease of cutting)
Cut a New Ruffle.
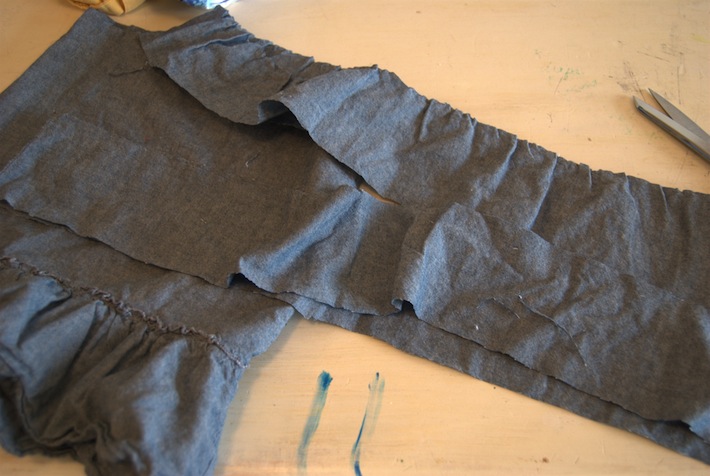
This strip I then divided in half (longways) to make two narrow strips, each the depth of the dress’s original ruffle.
Sewed And Gathered New Ruffle.
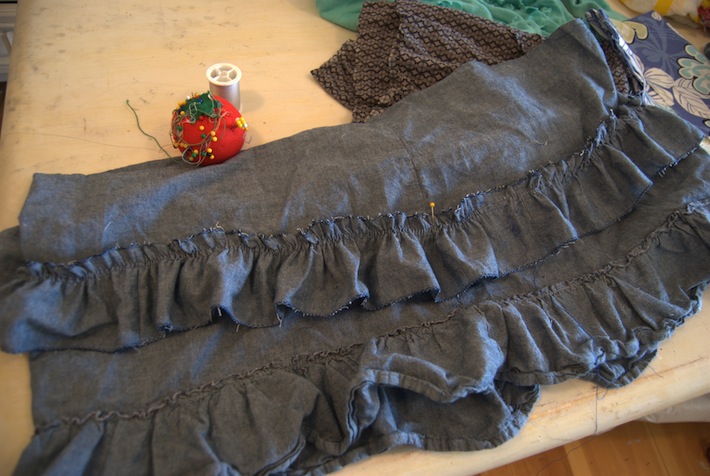
I sewed the strips end to end, forming a band that measured twice the circumference of the skirt, which I gathered into a ruffle and sewed onto the skirt just above the original ruffle. (I lightly zigzagged raw edges on the new ruffle; I didn’t hem. I like the sort-of-frayed/not-disintegrating finish).
Gathering Savvy From Experience:
I still don’t have a gathering foot. After crazymaking gathering sessions, where the bobbin thread would snap JUST as I was almost done gathering, I learned to use heavy thread (such as heavy duty or upholstery thread) in my bobbin for my gathering stitch, and to always use at least two rows of gathering stitches. The heavy bobbin thread has never broken.
*Finish with elastic Waistband:
I don’t have pictures, but this is an easy, basic step, finishing the skirt with a comfortable fit and gathering it all at once. I’ll include waistband instructions at the end of the post).
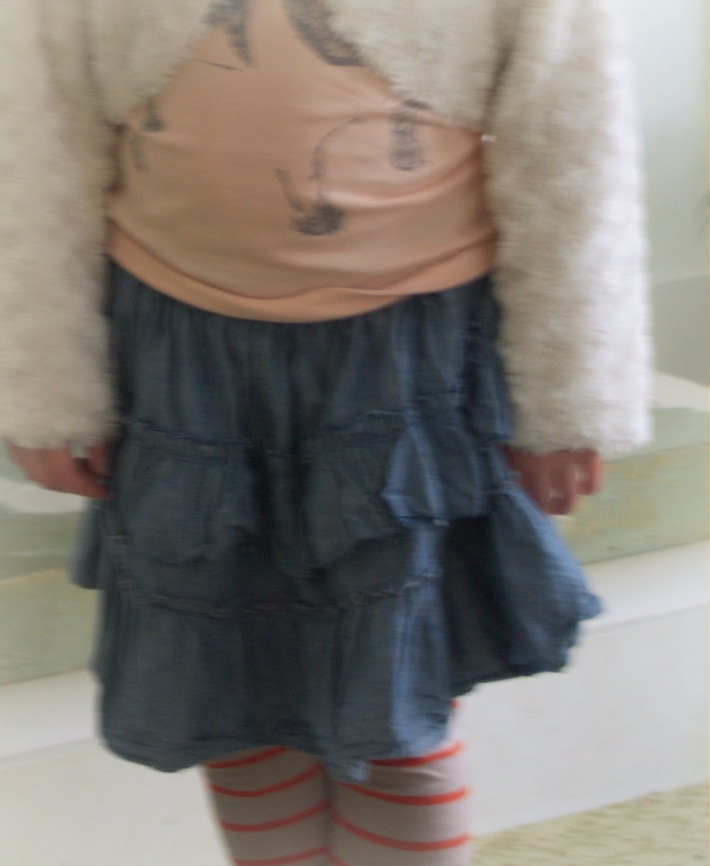
Nora was excited to see me sewing a skirt just for her; she has already worn it way more than her sisters wore the dress.
*(Elastic Waistband)
Make a casing for elastic at the top of the skirt by first folding a narrow (1/8-1/4 inch) hem and pressing it at the top of the skirt. Fold the hemmed top of the skirt down one more time, this time just a little wider than the width of the elastic you intend to use to gather the waist (I think I used 5/8 inch wide elastic; so this second finished hem would have been about 3/4 of an inch wide on Nora’s skirt). This will be the casing for the elastic, and this is also how the skirt is gathered and fitted to the waist. Sew the hem/casing, leaving a small gap to feed the elastic through. Cut elastic to fit; it should be long enough to wrap comfortably around the waist, plus a seam allowance. I pin a safety pin through the end of the elastic and use its bulk to help feed the elastic through the casing. Once the elastic is through, sew ends together and tuck the finished elastic into the opening you left in the casing. Finish sewing the casing shut, and you’re done!

Comments on this entry are closed.
Super cute! My daughter had a similar skirt on for church today, and the ruffles really made it extra adorable. Thanks for sharing at Pinworthy Projects.
Thanks Carrie!
This turned out AWESOME. I might be inspired!
Excited to find your blog and follow! I’d love for you to stop by my blog sometime and consider joining the Tuesday “oldies” link party!
http://www.dosmallthingswithlove.com
Nancy
That is beyond adorable!! Very clever too!
Thanks!
Love it!!!! Sooo cute!